
Sensay is an online platform that helps English teachers assign speaking assignments to students learning English. With multiple functions built into the platform, Sensay allows teachers to create and assign many different kinds of speaking exercises to students.
This is especially helpful for students who do not live in an environment where they can listen to and speak English often. Wih Sensay, students can practice listening to and speaking English during or outside of class, as often as they like. Sensay makes it easier for students to get plenty of listening and speaking practice, and Sensay makes it fun!
With automated assessment and instant AI-powered feedback, teachers don’t have to spend a lot of time and effort listening to and marking students one by one. In facts, hundreds of teachers report saving hours per day because they set up their speaking lessons, and then they leave all the work to Sensay.
Teachers can log in anytime to review reports in the system to see and listen to student’s recordings and scores for pronunciation, words spoken, fluency, and more.
This article will guide you on the basics on how to use Sensay whether you are a student or a teacher.
Account Registration
To use a Sensay account, make sure to register at learn.oksensay.com first. After registration is complete, follow the instructions below.
Instructions for Teachers
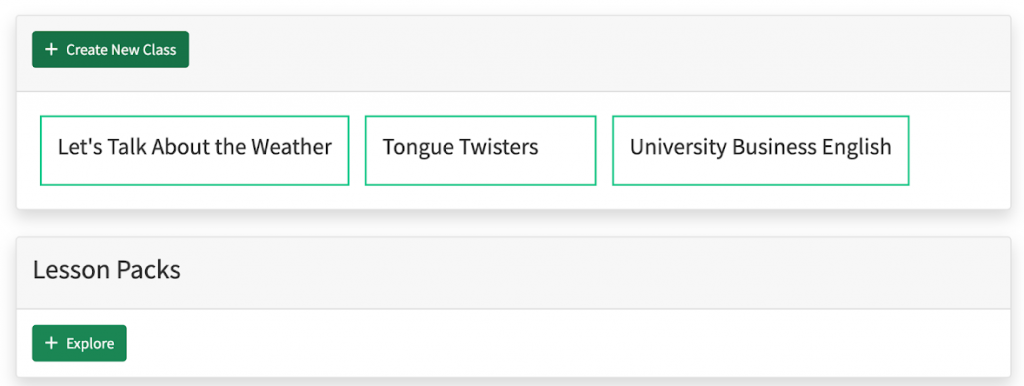
Step 1: Create a Class
First, teachers need to create a new class for students by clicking “Create New Class” and deciding on a name for the class.
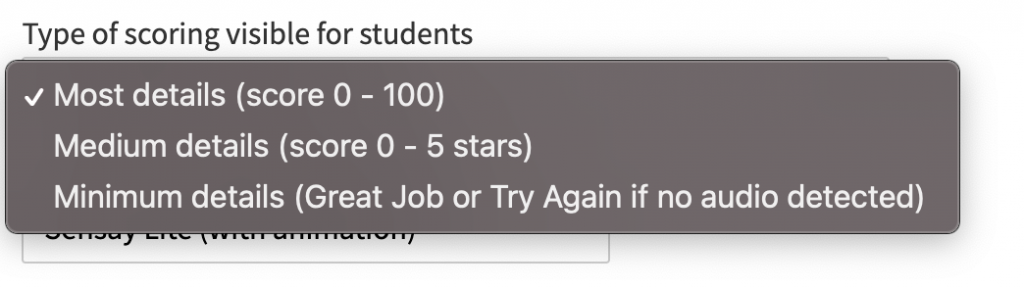
Step 2: Set Scoring Options
After setting up the class, teachers can set the scoring options by choosing one of the three levels of scoring that are available to choose:
- Most details give the students a score from zero to 100
- Medium details give students a score of zero to five stars
- Minimum details give students a message that says “Great Job” or “Try Again” if no audio was detected
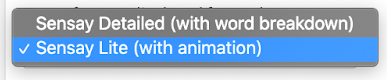
Step 3: Select a Report Type
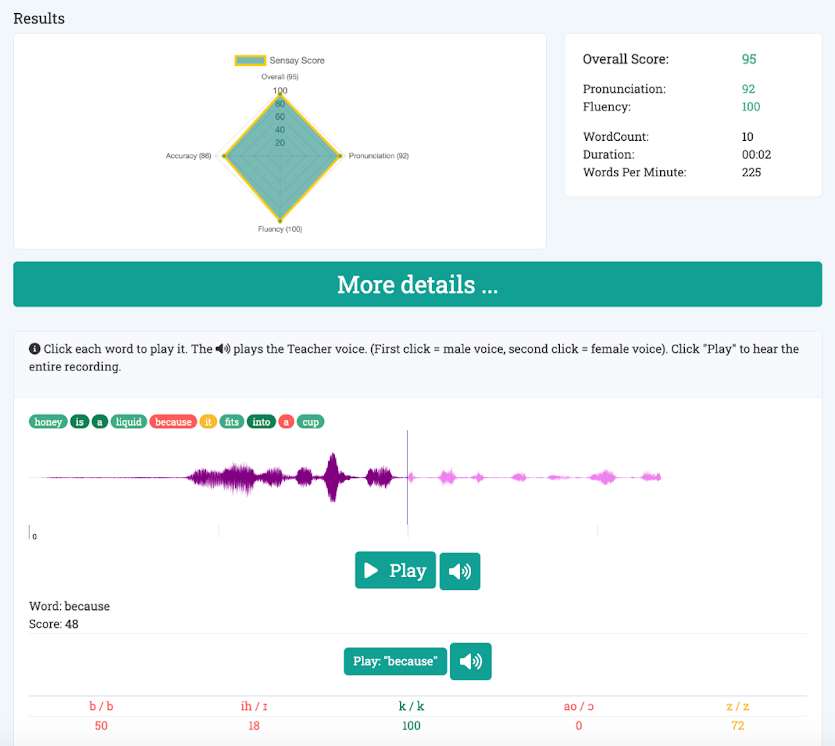
There are two different kinds of reports, Sensay Lite (with Animation) and Sensay Detailed (with word breakdown).
Sensay Lite Example
Sensay Detailed Example
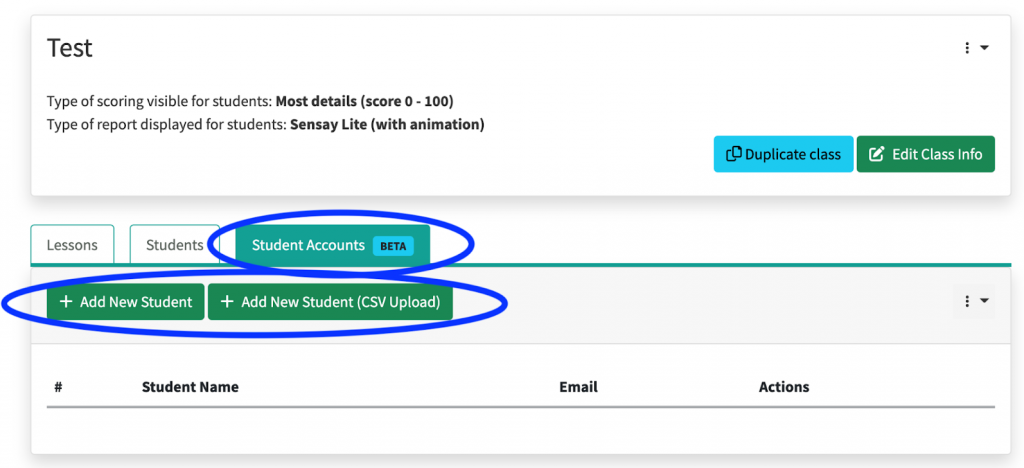
Step 4: Assigning Students to a Class
Add Students by clicking the Students tab. Add students one-by-one, or via CSV upload
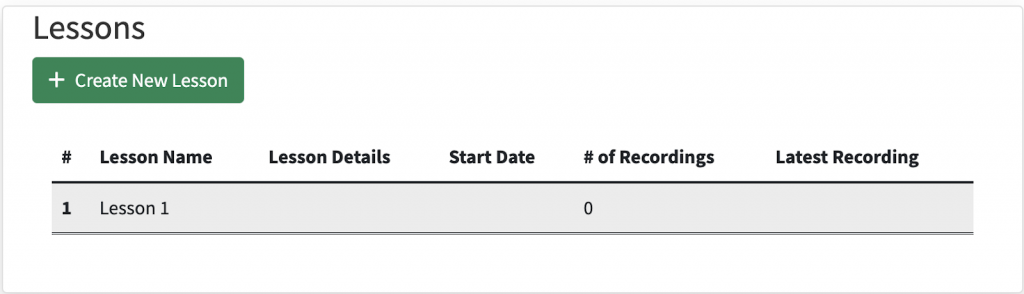
Step 5: Create a lesson
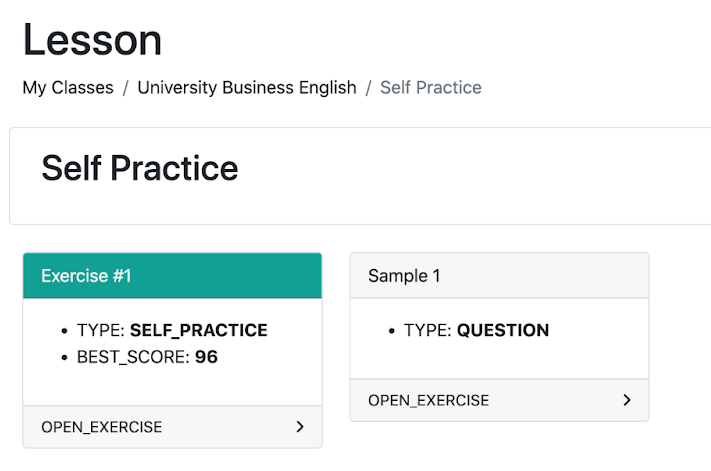
Click “Create New Lesson” in your newly created class and give it a name. The lesson is one of the most essential parts because it is the unit that contains all of your speaking exercises.
Step 6: Create an exercise
Click “Create New Exercise” to create a new exercise for your lesson
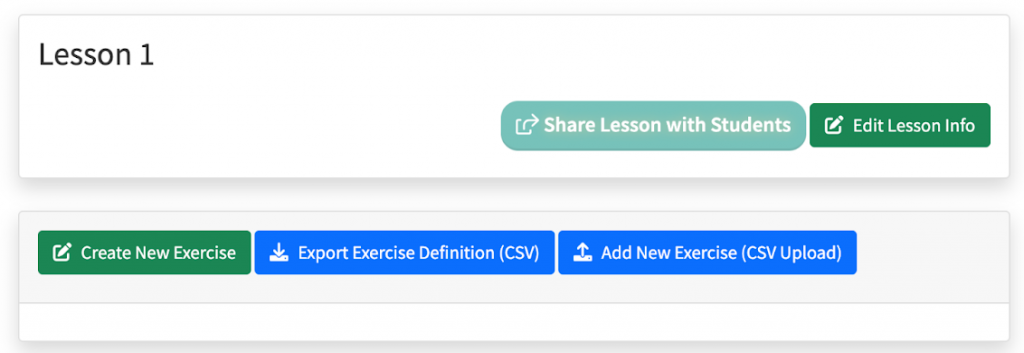
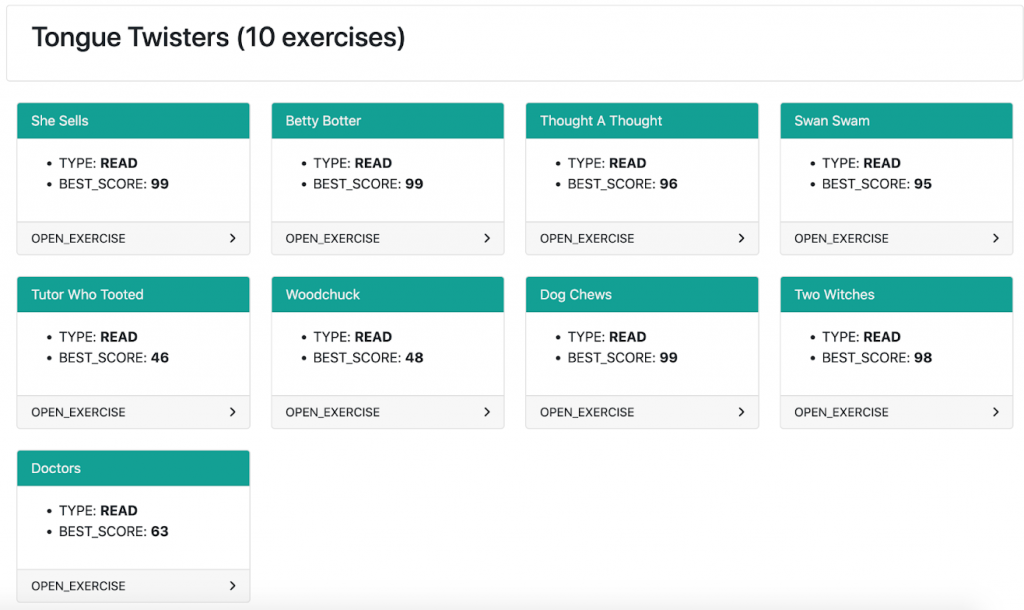
Teachers can choose five different types of exercises: reading, video, question and answer, self-practice, and image.
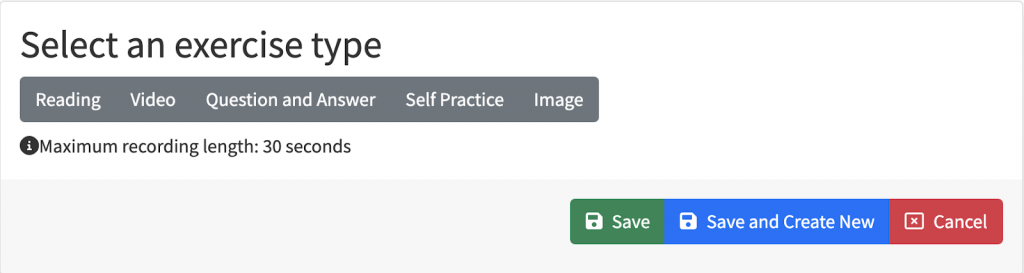
Click Save. That’s it! You are finished
Instructions for Students
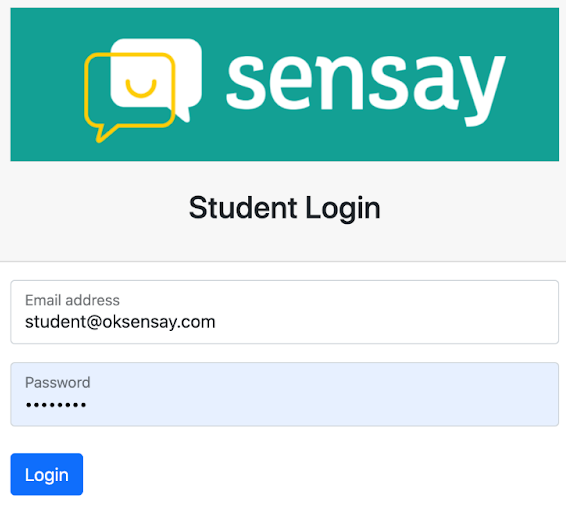
Step 1: Log in to their Student Account: learn.oksensay.com
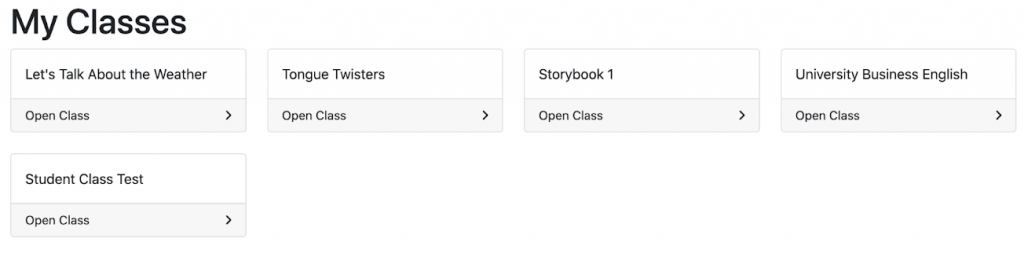
After logging in, the student will see all the Classes that they have been added into.
Step 2: Students should click into a Class to view the Lessons for that class.
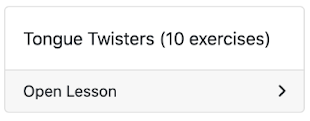
Step 3: Students can click to select a Lesson
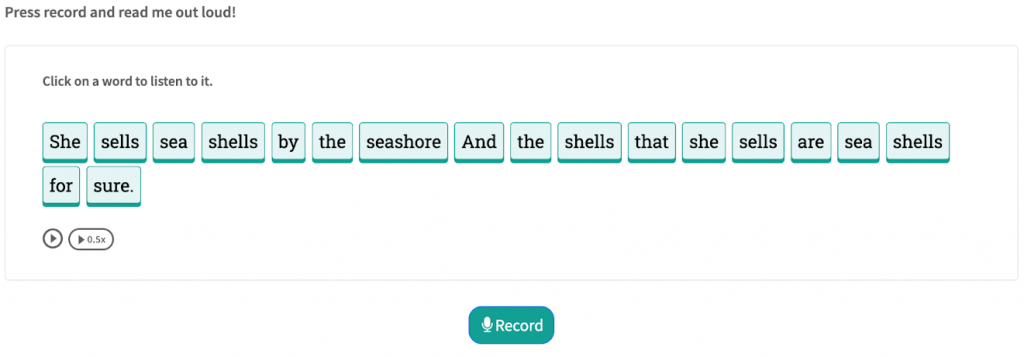
Step 4: Students can click to select an Exercise to record out loud
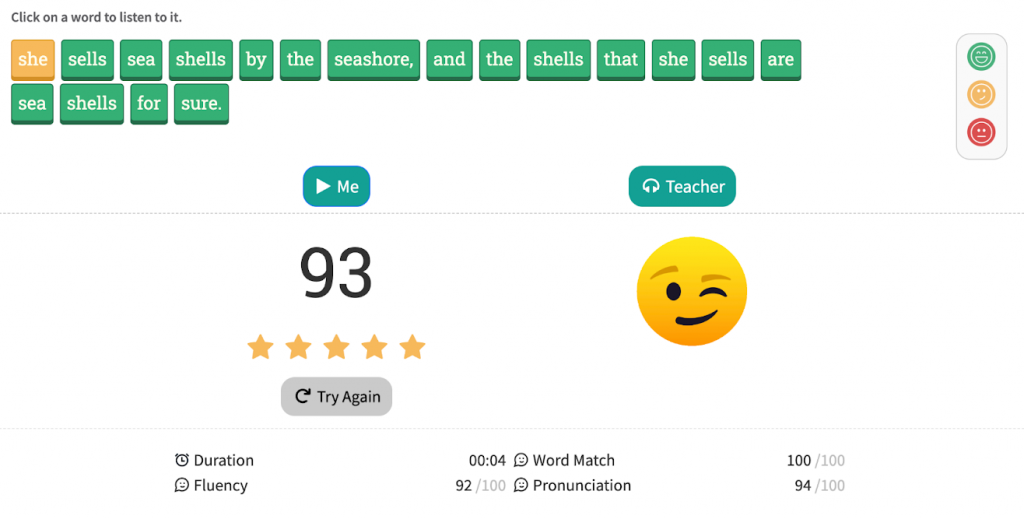
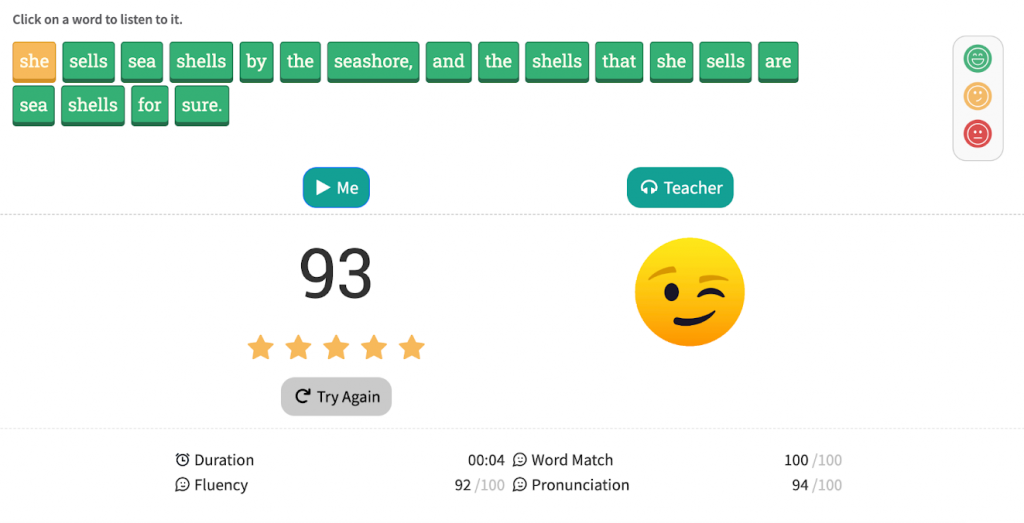
Step 5: Students can listen to the AI teacher’s voice first, record their answer, and instantly check the result after clicking “Submit”
After clicking “submit”, Sensay’s AI will mark it and students can see instantly their scores, including a breakdown of each word and what they have said. Also, it shows detailed feedback on what they can improve on their speech. Students can improve on their own and practice as often as they like, both speaking and listening.
Step 6: Continuous practice and self-improvement
Once the recording is submitted students have the option to listen to themselves by clicking “Me” and also listening to the Teacher AI voice by clicking “Teacher”.
They can see the scoring which are the colors red, yellow, or green. It will be green if there are no mistakes, yellow if there are a few issues, or it will be red for mispronunciation. If the student is not satisfied with the result, they can redo the task by clicking “Try Again” until they get the result that they are satisfied with. They can also choose another exercise to record. When the exercises have been completed, the color will turn green. Exercises that have not been completed are in grey.
That’s it! Easy right? Enjoy helping your students to have fun practicing speaking English in a challenging but low-pressure way.